 Quaker Farm Home
Contact & Visitor Info
Guest Speaker Info
Raw Honey
Free Range Eggs
Quaker Soaps
Wool & Fiber
Grass fed Lamb & Mutton
Collie Dogs
Learn more about life
on the farm!
Click here to read
Quaker Anne's
Children's Stories
 Stories include:
How Bees Make Honey
A Chicken is Born
A Haircut for Sheep
A Baby Horse is Born
A Baby Goat is Born
Lassie Saves a Lamb
|
Quaker Hill Farm
If this site has been helpful to you, please
donate to help support it.
Making Sugar Snow Maple Candy
An Early American Pioneer Craft
by Quaker Anne
Note: This project is an excellent opportunity to study early American history with children.
History
never tasted so good!
This story was written for the young at heart.
Maple Syrup Fact: Maple syrup production is the oldest agricultural
enterprise in the United States.
When maple syrup is made in early spring, it provides an opportunity to make a delicious unique candy called
"Snow Candy" or Sugar-on-Snow.
In the pioneer days, once the sap from maple trees had been boiled down into maple syrup
some was set to make maple sugar candy. Maple sugar is made from boiling maple syrup until it granulates, but just minutes before it granulates,
a chewy
candy can be made by pouring the thick candy-like syrup onto fresh clean snow. Cooled for just a few seconds, it can then
be pulled and handled like taffy - that's called Snow Candy!
In the old days, sugar season was a wonderful time of the year that lasted only a few weeks. The work was hard and
long but the resulting maple syrup and sugar was well worth it. Working on this project gives one an opportunity to feel what it
must have been like to have real pioneer candy. Remember, back then sugar was a very rare luxury and "Snow Candy" was an extra special treat!
How to make Snow Candy
Only 2 ingredients are needed to make Snow Candy:
2 cups of maple syrup and
Fresh, clean snow
This is a task for a Mom, Dad or adult to do with youngsters because liquid candy is very, very hot. Please use caution.
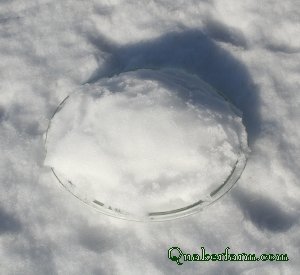 First, fill a container with clean fresh packed snow and set aside outside where it will stay nice and cold.
A pie plate works well for the project.
First, fill a container with clean fresh packed snow and set aside outside where it will stay nice and cold.
A pie plate works well for the project.
 Next, pour maple syrup into a sauce pan and heat gradually until syrup begins to boil. Adjust temperature when
it gets to a rolling
boil to keep it from boiling over.
Next, pour maple syrup into a sauce pan and heat gradually until syrup begins to boil. Adjust temperature when
it gets to a rolling
boil to keep it from boiling over.
 After just a few minutes on heat just low enough to keep a low rolling boil, the bubbles will begin to change in color and consistency.
There is no need to stir, but it must be monitored constantly - literally, don't take your eyes off the project.
After just a few minutes on heat just low enough to keep a low rolling boil, the bubbles will begin to change in color and consistency.
There is no need to stir, but it must be monitored constantly - literally, don't take your eyes off the project.
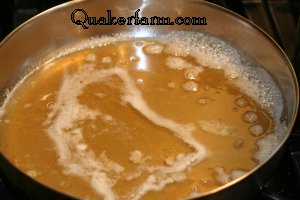
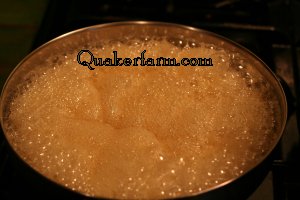 At first the mixture boils with a good amount of large airy bubbles - the mass will be light amber in color.
If you are using a thermometer, heat maple syrup to 22 to 28 degrees F. above the boiling point of water.
Heating the syrup to around 234 works well. A higher heat will make a stiffer candy.
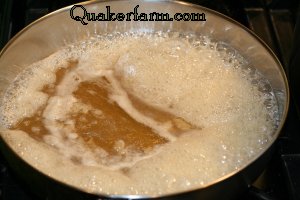
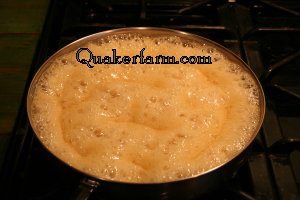 As the hot syrup nears the candy stage, there will be fewer and fewer large bubbles and the mass will become more foamy in consistency.
We actually don't use a candy thermometer because we want to preserve the true nature of the craft by teaching others
how our ancestors did
this without the use of modern kitchen aids.
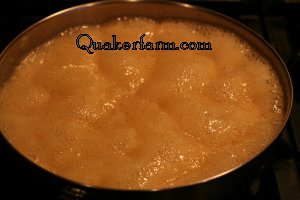 In a mere matter of seconds, the rolling liquid will become uniform in consistency and the beautiful amber mass will take on a glassy
appearance. This is the stage where it is ready to pour - you now have liquid candy!
In a mere matter of seconds, the rolling liquid will become uniform in consistency and the beautiful amber mass will take on a glassy
appearance. This is the stage where it is ready to pour - you now have liquid candy!
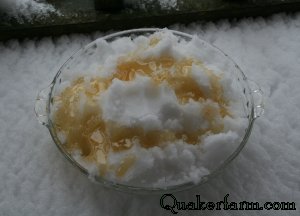
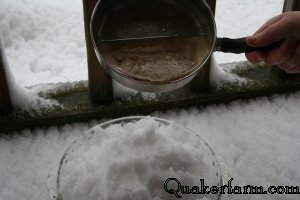 Pour the liquid in a thin stream onto the snow in your pan. This liquid candy is very, very hot!
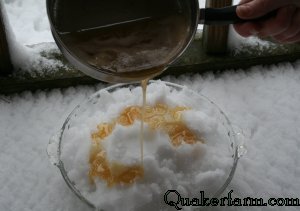 Make large swirls and even pretty designs but do not pour too much on top of itself.
It will cool so rapidly that it
does not have a chance to crystallize. The result is a glassy looking, chewy, taffy-like candy
on the the snow.

Wait about 15 seconds - just long enough for the candy to cool to touch, and pick up your first piece of real
maple sugar candy. You can use a fork or your fingers - it is best to butter your fingers
first so your fingers don't get sticky.
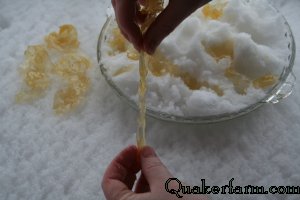
But wait, before you taste it, pull and twist it a little like taffy - you can make interesting shapes and designs with it.
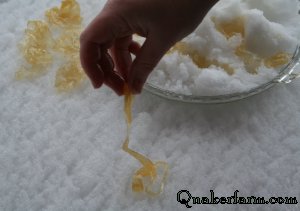
Be sure to collect your candy and put it in a place to dry. If you leave it on the snow for too long, it will begin to melt.
It is customary to enjoy Maple Sugar Snow Candy with plain donuts and even sour pickles to help cut the sweet taste a bit.
Now you know one of the ways pioneer families celebrated the arrival of spring time!
Click here to learn all about where our maple syrup comes from!
If this site has been helpful to you, please
donate to help support it.
Return to Quaker Anne's Children's Stories
Return to Quaker Hill Farm Homepage
We thank thee for visiting our site welcome thee will visit again soon.
"The Lord bless thee and keep thee...."
- Numbers 6:24
|